Groot - Interacting with Behavior Trees

Overview
Groot is the companion application of the BehaviorTree.CPP library used to create, edit, and visualize behavior trees. Behavior Trees are deeply integrated into Nav2, used as the main method of orchestrating task server logic across a complex navigation and autonomy stack. Behavior Trees, in short BTs, consist of many nodes completing different tasks and control the flow of logic, similar to a Hierarchical or Finite State Machine, but organized in a tree structure. These nodes are of types: Action, Condition, Control, or Decorator, and are described in more detail in Navigation Concepts and BehaviorTree.CPP.
Writing a New Behavior Tree Plugin offers a well written example of creating a simple Action node if creating new BT nodes is of interest. This tutorial will focus solely on launching Groot, visualizing a Behavior Tree, and modifying that tree for a given customization, assuming a library of BT nodes. Luckily, Nav2 provides a robust number of BT nodes for your use out of the box, enumerated in Navigation Plugins.
A BT configuration file in BehaviorTree.CPP is an XML file. This is used to dynamically load the BT node plugins at run-time from the appropriate libraries mapped to their names. The XML format is defined in detail here. Therefore, Groot needs to have a list of nodes it has access to and important metadata about them like their type and ports (or parameters). We refer to this as the “palette” of nodes later in the tutorial.
In the video above you can see Groot side-by-side with RVIz and a test platform 100% equipped with ROS-enabled hardware from SIEMENS. Groot not only displays the current Behavior Tree while the robot is operating. Note: Before ROS 2 Humble, live Groot behavior tree monitoring during execution was supported in Nav2. This was removed due to buggy support in BT.CPP / Groot for changing behavior trees on the fly, see Galactic to Humble for more details.
Visualize Behavior Trees
To display a Behavior Tree like that in Figure 3, we will first start the Groot executable. Out of the box, Groot can only display Behavior Trees and nodes that are from the defaults in BT.CPP, since it does not know anything about Nav2 or your other projects. Therefore, we must point Groot to our palette, or index, of Nav2 / custom behavior tree nodes:
Open Groot in editor mode. Now, Groot should look like in Figure 1.
Select the Load palette from file option either via the context menu or the import icon in the top middle of the menu bar.
Open the file /path/to/navigation2/nav2_behavior_tree/nav2_tree_nodes.xml to import all the custom behavior tree nodes used for navigation. This is the palette of Nav2 custom behavior tree nodes. Now, Groot should look like in Figure 2.
Select Load tree option near the top left corner
Browse the tree you want to visualize, then select OK. The Nav2 BTs exist in /path/to/navigation2/nav2_bt_navigator/behavior_trees/
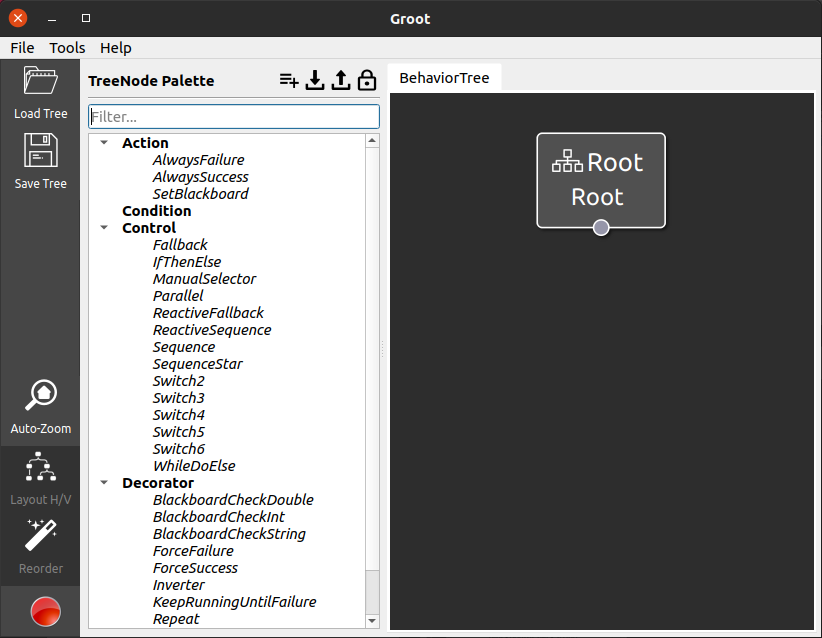
Figure 1 Default Editor View¶ |
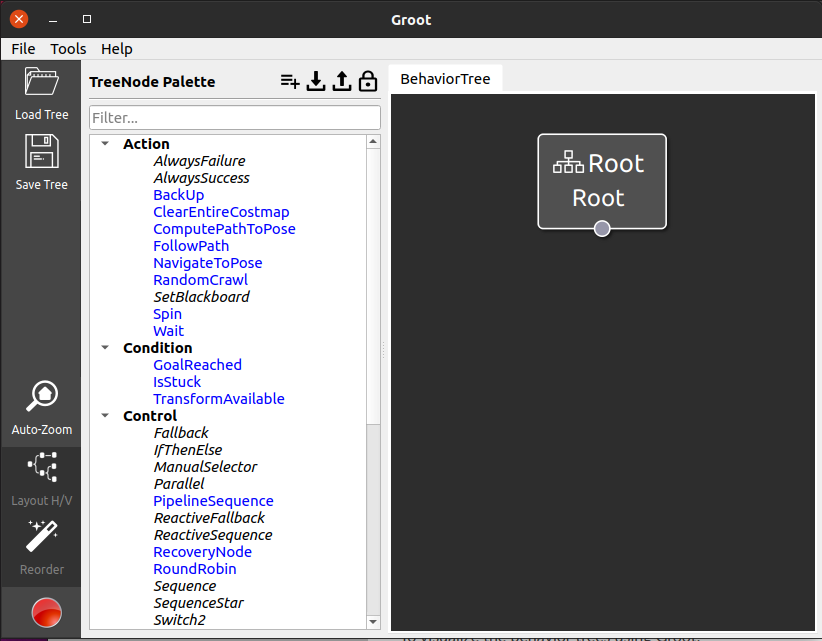
Figure 2 Editor with Custom Nodes loaded in blue¶ |
If you select the default tree navigate_w_replanning_and_recovery.xml, then a Groot editor should look like Figure 3.
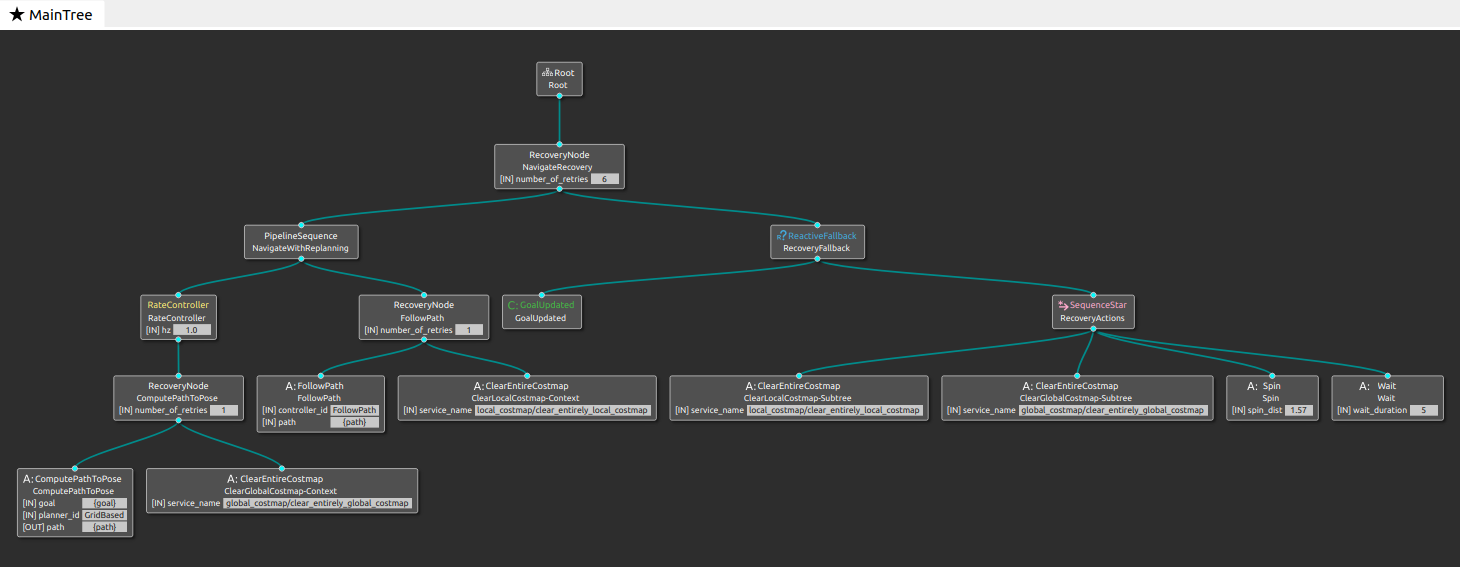
Figure 3 Full Nav2 Default BehaviorTree¶ |
Note
If a tree cannot be visualized because some nodes are missing in the palette, you might need to add it to your palette. While we try to keep Nav2’s BT nodes and palettes in sync, if you notice one is missing, please file a ticket or pull request and we should have that updated quickly.
Edit Behavior Trees
Now that you have a Nav2 BT open in Groot in editor mode, you should be able to trivially modify it using the GUI. Starting from a screen like that shown in Figure 3, you can pull in new nodes from the side panel to add them to the workspace. You may then connect the nodes using a “drag and drop” motion between the node’s input and output ports to assemble the new nodes into the tree.
If you select a given node, you can change metadata about it such as its name or values of parameterizable ports. When you’re done modifying, simply save the new configuration file and use that on your robot the next time!
Adding A Custom Node
Each node in the behavior tree holds a specialized function. Sometimes, its useful to create new nodes and add them to your palette during the design process - perhaps before the implementations themselves exist. This helps designers abstract away the implementation specifics of the nodes from the higher level logic of the tree itself and how they’d like to interact with a given node (e.g. type, ports, etc). Within Groot, you may create new custom nodes to add to your tree and export these new nodes back to your palette. Implementing the node itself needs to be done separately from Groot, which is described in Writing a New Behavior Tree Plugin.
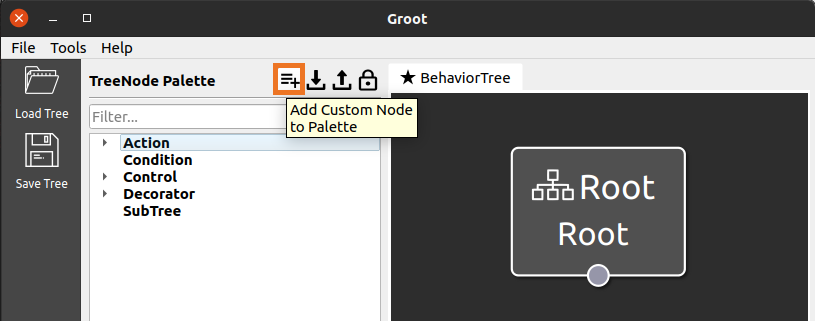
Figure 4 Create a new Custom Node¶ |
Creating a new custom node can be started by clicking the orange marked icon in Figure 4, while Groot is in Editor mode. This should load a new window, similar to Figure 5. In this new window, it asks you to fill in the metadata about this new node, in order to create it. It will ask you for standard information such as name (green box), type of node (orange box), and any optional ports for parameterization or access to blackboard variables (blue box).
After completing, select OK in Figure 5, the new custom node should appear in blue in the TreeNode Palette as in Figure 6.
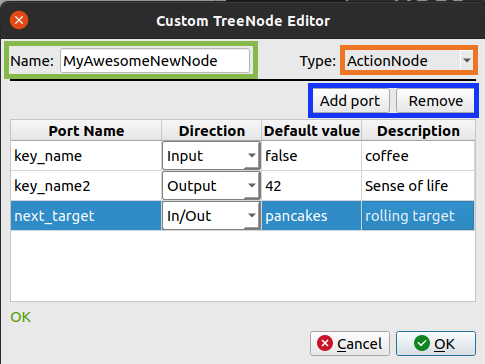
Figure 5 UI to describing new Nodes¶ |
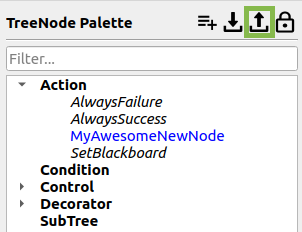
Figure 6 Exporting the new Custom Node¶ |
Before starting to create a new BT based on the new custom nodes, it is recommend to export the newly created nodes to save in case of Groot crashing. This can be performed with the icon highlighted in green from Figure 6. The resulting XML output from the node created in Figure 5 can be seen below. You can see more examples in Nav2’s BT Node Palette XML.
<root>
    <TreeNodesModel>
        <Action ID="MyAwesomeNewNode">
            <input_port name="key_name" default="false">coffee</input_port>
            <output_port name="key_name2" default="42">Sense of life</output_port>
            <inout_port name="next_target" default="pancakes">rolling target</inout_port>
        </Action>
    </TreeNodesModel>
</root>