Setting Up the Robot’s Footprint
In this guide, we will discuss how to configure the footprint of your robot for the navigation algorithms used by Nav2. We will also show a sample footprint configuration on sam_bot, the simulated robot that we have been building in this series of setup guides. Lastly, we will also show the visualization of sam_bot’s footprint in RViz to ensure that we have set it up correctly.
Footprint Introduction
The footprint outlines the robot’s 2D shape when projected to the ground and is primarily used by Nav2 to avoid collisions during planning. The algorithms involved in this task makes sure that the robot does not collide with the obstacles in the costmap while it computes the robot’s paths or plans.
The footprint is set up using the footprint or robot_radius parameter of the global and local costmaps which we tackled in the previous tutorials (Setting Up Sensors Guide). The value defined in the footprint parameter is an ordered vector of 2-D points defining the robot’s footprint with the base_link frame as the origin. The first and last points in the vector are joined into the last line segment to close the footprint’s shape. As an alternative, you may also use the robot_radius parameter wherein circular footprint is automatically generated and centered at base_link. In cases both the footprint and robot_radius parameters have been defined in the configuration, the footprint is used.
See also
A section in the previous guide, Configuring nav2_costmap_2d, explains how to configure basic costmap parameters. Please refer to that guide for more details on costmap configuration.
For the global costmap footprint, the decision to choose between the robot_radius (circular) or footprint (polygon) parameter depends on the robot, its environment, and the path planning algorithm you will use. Even if you are working with a non-circular robot, there may be situations where a circular footprint is acceptable. For example, path planning algorithms like NavFn assume that the robot is circular since it only checks for collision per grid cell, so it will not be necessary to outline the robot’s exact shape for its footprint. On the other hand, algorithms such as Smac Planner’s Hybrid-A* perform collision checking on the robot’s polygon-shaped footprint if possible and necessary. Hence, it might be useful to use a polygon-shaped footprint. Another example is having a small RC car sized robot roaming a warehouse. This robot is so small it won’t need to make confined maneuvers – thusly approximating it with the largest cross-sectional radius is a good time-saving optimization.
For the local costmap footprint, it is typical for non-circular robots to be set up with footprint (polygon). Some situations where this is not recommended is when you do not have enough computing resources to implement collision avoidance algorithms on a polygon-shaped footprint. Another possible reason to use robot_radius (circular) for the local costmap is when the robot is very small relative to its environment such that precise collision avoidance is not necessary. However, generally the local trajectory planner should use the actual footprint polygon of the robot.
Note that this can also be adjusted over time using the costmap’s ~/footprint topic, which will update the polygon over time as needed due to changes in the robot’s state, such as movement of an attached manipulator, picking up a pallet, or other actions that adjust a robot’s shape. That polygon will then automatically be used by the planners and controllers.
Configuring the Robot’s Footprint
In this section, we will configure the footprint of sam_bot such that footprint (polygon) is used for the local costmap and robot_radius (circular) is used for the global costmap. We will utilize the default configuration file of Nav2 with a modified footprint parameter for the global and local costmaps.
Note
The complete source code for sam_bot can be found in navigation2_tutorials repository.
Under the config directory, create a new file named nav2_params.yaml. Next, copy the contents of config/nav2_params.yaml and paste them into the newly created file. The contents of config/nav2_params.yaml are copied from the default configuration file of Nav2 but with changes in the footprint and robot_radius parameters to match the shape of sam_bot.
See also
The default configuration file for Nav2 can be found in the official Navigation2 repository.
Below is the code snippet from nav2_params.yaml defining the local costmap footprint. In this configuration file, the footprint parameter of the local costmap has already been set with a rectangular-shaped footprint. This box is centered at the base_link frame of sam_bot.
188 189 190 | resolution: 0.05 footprint: "[ [0.21, 0.195], [0.21, -0.195], [-0.21, -0.195], [-0.21, 0.195] ]" plugins: ["voxel_layer", "inflation_layer"] |
For the global costmap, we have already set the robot_radius parameter to create a circular footprint that matches sam_bot’s size and centered at base_link. The parameter that was modified is shown in the code snippet below.
232 233 234 | use_sim_time: True robot_radius: 0.3 resolution: 0.05 |
Build, Run and Verification
We will now confirm that we have properly set up sam_bot’s footprint.
First, we launch launch/display.launch.py to launch the robot state publisher, spawn sam_bot in Gazebo, and visualize sam_bot and its footprint in Rviz. The robot state publisher publishes the base_link => sensors transforms defined in sam_bot’s URDF, while Gazebo’s differential drive plugin publishes the odom => base_link transform. Open a new terminal and execute the lines below.
colcon build
. install/setup.bash
ros2 launch sam_bot_description display.launch.py
After launching display.launch.py, RViz and Gazebo should open. RViz should show sam_bot, the frames of sam_bot’s parts, and the odom frame without errors. Gazebo should show sam_bot with a sphere and a cube detectable by sambot’s lidar sensor.
Next, we will publish the map => odom transform using the static_transform_publisher. We publish the map => odom transform as static in this guide as a simple way to publish the transform and visualize the footprint. Open a new terminal and execute the lines below.
ros2 run tf2_ros static_transform_publisher 0 0 0 0 0 0 map odom
The map => odom transform should now be being published and the map frame should be added in RViz without errors.
Lastly, we will launch Nav2 using the nav2_params.yaml configuration file we just made and navigation_launch.py, the built-in launch file of nav2_bringup. Open a new terminal and execute the following:
ros2 launch nav2_bringup navigation_launch.py params_file:=<full/path/to/config/nav2_params.yaml>
We should now be able to visualize the footprints in RViz, which will be discussed in the next section.
Visualizing Footprint in RViz
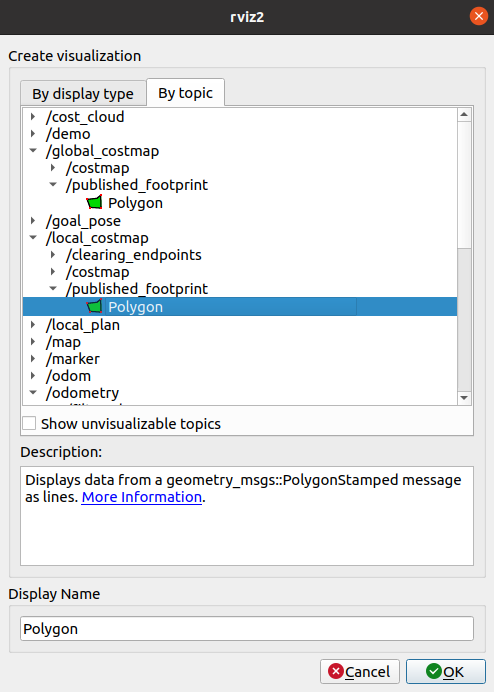
To visualize the footprint of the local costmap, click the add button at the bottom-left part of the RViz window. Under the By topic tab, select the Polygon under the /local_costmap/published_footprint topic, as shown below.
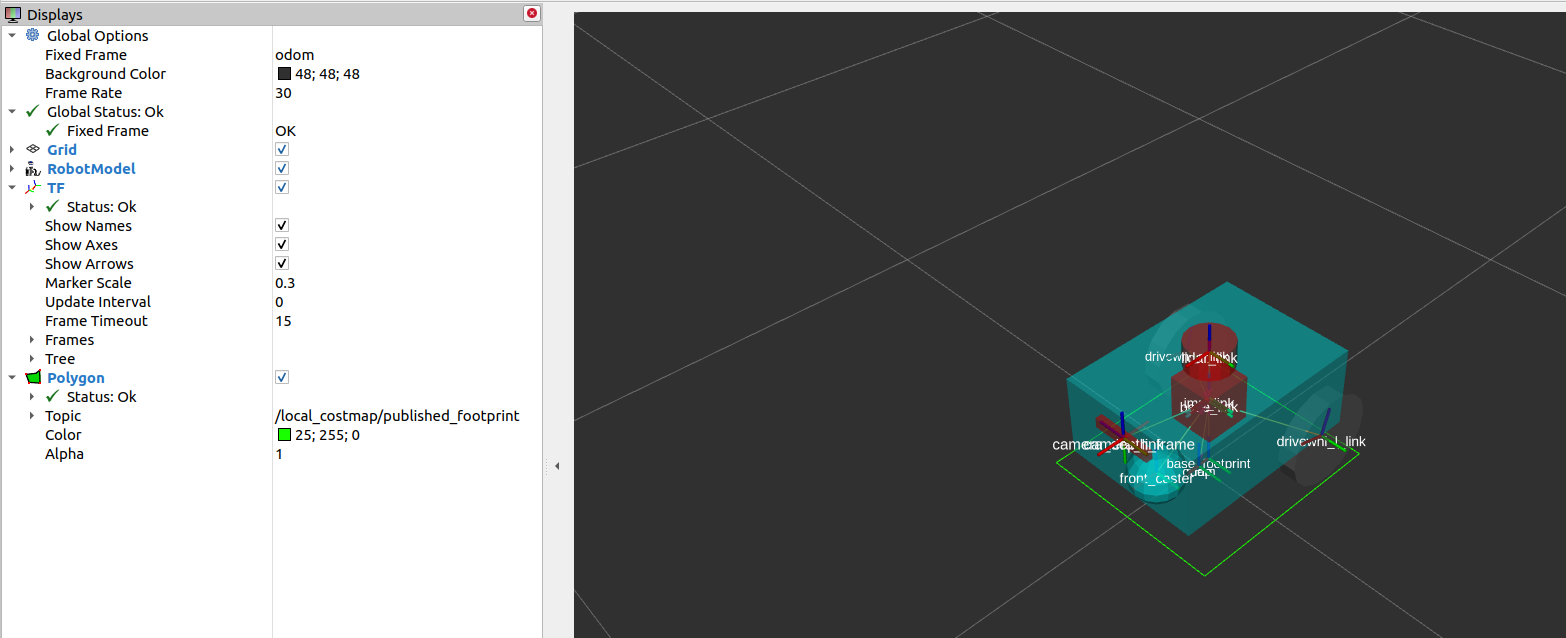
Set the fixed frame in RViz to odom and you should see the rectangular-shaped footprint of sam_bot:
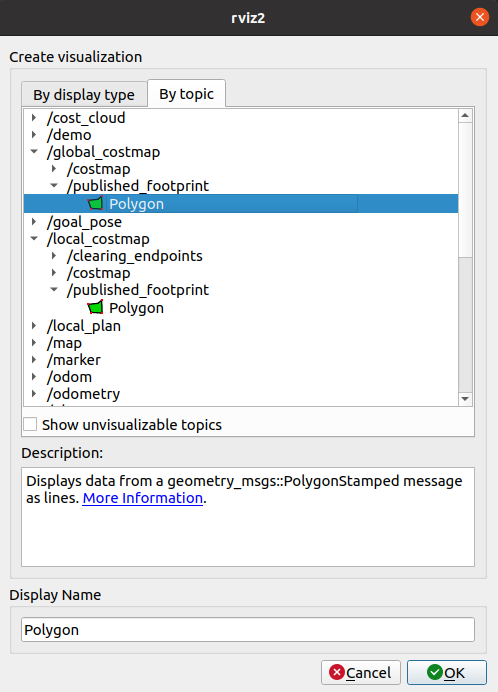
On the other hand, for the global costmap, click the add button at the bottom-left part of the RViz window. Go to By topic tab then select the Polygon under the /global_costmap/published_footprint topic, as shown below.
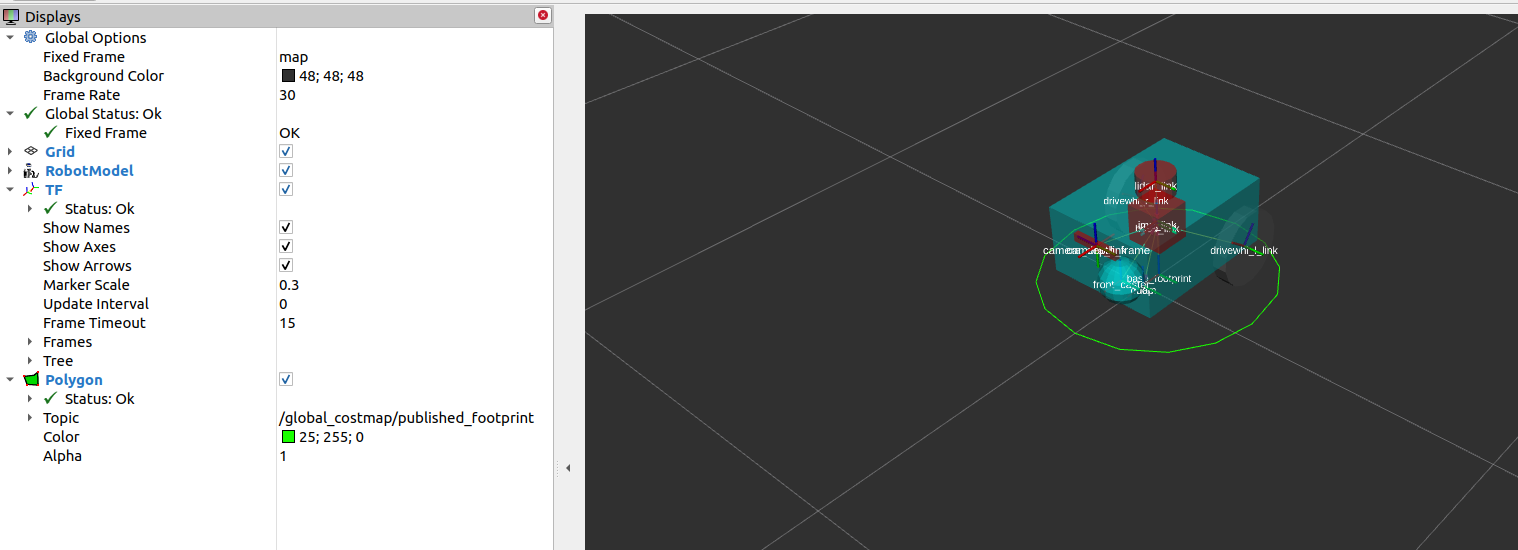
Set the fixed frame in RViz to map and you should see the circular footprint of sam_bot:
Conclusion
In this guide, we have shown how to configure a circular and polygon-shaped footprint for your robot. This footprint is important since it plays a major role in Nav2’s pathfinding algorithms function.
As a demo, we have configured the costmap footprint parameters of sam_bot. We set the local costmap to use a polygon-shaped footprint following sam_bot’s shape while we set the the global costmap to use a circular footprint. Lastly, we visualized and confirmed the footprints of the local and global costmaps in RViz.