Writing a New Planner Plugin
Overview
This tutorial shows how to create your own planner plugin.
Requirements
ROS 2 (binary or build-from-source)
Nav2 (Including dependencies)
Gazebo
Turtlebot3
Tutorial Steps
1- Creating a new Planner Plugin
We will create a simple straight-line planner.
The annotated code in this tutorial can be found in navigation_tutorials repository as the nav2_straightline_planner.
This package can be considered as a reference for writing planner plugin.
Our example plugin inherits from the base class nav2_core::GlobalPlanner. The base class provides 5 pure virtual methods to implement a planner plugin. The plugin will be used by the planner server to compute trajectories.
Let’s learn more about the methods needed to write a planner plugin.
Virtual method |
Method description |
Requires override? |
configure() |
Method is called at when planner server enters on_configure state. Ideally this methods should perform declarations of ROS parameters and initialization of planner’s member variables. This method takes 4 input params: shared pointer to parent node, planner name, tf buffer pointer and shared pointer to costmap. |
Yes |
activate() |
Method is called when planner server enters on_activate state. Ideally this method should implement operations which are neccessary before planner goes to an active state. |
Yes |
deactivate() |
Method is called when planner server enters on_deactivate state. Ideally this method should implement operations which are neccessary before planner goes to an inactive state. |
Yes |
cleanup() |
Method is called when planner server goes to on_cleanup state. Ideally this method should clean up resoures which are created for the planner. |
Yes |
createPlan() |
Method is called when planner server demands a global plan for specified start and goal pose. This method returns nav_msgs::msg::Path carrying global plan. This method takes 2 input parmas: start pose and goal pose. |
Yes |
For this tutorial, we will be using methods StraightLine::configure() and StraightLine::createPlan() to create straight-line planner.
In planners, configure() method must set member variables from ROS parameters and any initialization required,
node_ = parent;
tf_ = tf;
name_ = name;
costmap_ = costmap_ros->getCostmap();
global_frame_ = costmap_ros->getGlobalFrameID();

// Parameter initialization
nav2_util::declare_parameter_if_not_declared(node_, name_ + ".interpolation_resolution", rclcpp::ParameterValue(0.1));
node_->get_parameter(name_ + ".interpolation_resolution", interpolation_resolution_);
Here, name_ + ".interpolation_resolution" is fetching the ROS parameters interpolation_resolution which is specific to our planner. Nav2 allows the loading of multiple plugins, and to keep things organized, each plugin is mapped to some ID/name. Now if we want to retrieve the parameters for that specific plugin, we use <mapped_name_of_plugin>.<name_of_parameter> as done in the above snippet. For example, our example planner is mapped to the name “GridBased” and to retrieve the interpolation_resolution parameter which is specific to “GridBased”, we used Gridbased.interpolation_resolution. In other words, GridBased is used as a namespace for plugin-specific parameters. We will see more on this when we discuss the parameters file (or params file).
In createPlan() method, we need to create a path from the given start to goal poses. The StraightLine::createPlan() is called using start pose and goal pose to solve the global path planning problem. Upon succeeding, it converts the path to the nav_msgs::msg::Path and returns to the planner server. Below annotation shows the implementation of this method.
nav_msgs::msg::Path global_path;

// Checking if the goal and start state is in the global frame
if (start.header.frame_id != global_frame_) {
  RCLCPP_ERROR(
    node_->get_logger(), "Planner will only except start position from %s frame",
    global_frame_.c_str());
  return global_path;
}

if (goal.header.frame_id != global_frame_) {
  RCLCPP_INFO(
    node_->get_logger(), "Planner will only except goal position from %s frame",
    global_frame_.c_str());
  return global_path;
}

global_path.poses.clear();
global_path.header.stamp = node_->now();
global_path.header.frame_id = global_frame_;
// calculating the number of loops for current value of interpolation_resolution_
int total_number_of_loop = std::hypot(
  goal.pose.position.x - start.pose.position.x,
  goal.pose.position.y - start.pose.position.y) /
  interpolation_resolution_;
double x_increment = (goal.pose.position.x - start.pose.position.x) / total_number_of_loop;
double y_increment = (goal.pose.position.y - start.pose.position.y) / total_number_of_loop;

for (int i = 0; i < total_number_of_loop; ++i) {
  geometry_msgs::msg::PoseStamped pose;
  pose.pose.position.x = start.pose.position.x + x_increment * i;
  pose.pose.position.y = start.pose.position.y + y_increment * i;
  pose.pose.position.z = 0.0;
  pose.pose.orientation.x = 0.0;
  pose.pose.orientation.y = 0.0;
  pose.pose.orientation.z = 0.0;
  pose.pose.orientation.w = 1.0;
  pose.header.stamp = node_->now();
  pose.header.frame_id = global_frame_;
  global_path.poses.push_back(pose);
}

global_path.poses.push_back(goal);

return global_path;
The remaining methods are not used but it’s mandatory to override them. As per the rules, we did override all but left them blank.
2- Exporting the planner plugin
Now that we have created our custom planner, we need to export our planner plugin so that it will be visible to the planner server. Plugins are loaded at runtime and if they are not visible, then our planner server won’t be able to load it. In ROS 2, exporting and loading plugins is handled by pluginlib.
Coming back to our tutorial, class nav2_straightline_planner::StraightLine is loaded dynamically as nav2_core::GlobalPlanner which is our base class.
To export the planner, we need to provide two lines
#include "pluginlib/class_list_macros.hpp"
PLUGINLIB_EXPORT_CLASS(nav2_straightline_planner::StraightLine, nav2_core::GlobalPlanner)
Note that it requires pluginlib to export out plugin’s class. Pluginlib would provide as macro PLUGINLIB_EXPORT_CLASS which does all the work of exporting.
It is good practice to place these lines at the end of the file, but technically, you can also write at the top.
Next step would be to create plugin’s description file in the root directory of the package. For example,
global_planner_plugin.xmlfile in our tutorial package. This file contains the following information
library path: Plugin’s library name and its location.
class name: Name of the class.
class type: Type of class.
base class: Name of the base class.
description: Description of the plugin.
<library path="nav2_straightline_planner_plugin">
  <class type="nav2_straightline_planner::StraightLine" base_class_type="nav2_core::GlobalPlanner">
    <description>This is an example plugin which produces straight path.</description>
  </class>
</library>
Next step would be to export plugin using
CMakeLists.txtby using cmake functionpluginlib_export_plugin_description_file(). This function installs plugin description file tosharedirectory and sets ament indexes to make it discoverable.
pluginlib_export_plugin_description_file(nav2_core global_planner_plugin.xml)
Plugin description file should also be added to
package.xml
<export>
  <build_type>ament_cmake</build_type>
  <nav2_core plugin="${prefix}/global_planner_plugin.xml" />
</export>
Compile and it should be registered. Next, we’ll use this plugin.
3- Pass the plugin name through params file
To enable the plugin, we need to modify the nav2_params.yaml file as below to replace following params
Note
For Galactic or later, plugin_names and plugin_types have been replaced with a single plugins string vector for plugin names. The types are now defined in the plugin_name namespace in the plugin: field (e.g. plugin: MyPlugin::Plugin). Inline comments in the code blocks will help guide you through this.
planner_server:
  ros__parameters:
    plugins: ["GridBased"]
    use_sim_time: True
    GridBased:
      plugin: "nav2_navfn_planner::NavfnPlanner" # For Foxy and later. In Iron and older versions, "/" was used instead of "::"
      tolerance: 2.0
      use_astar: false
      allow_unknown: true
with
planner_server:
  ros__parameters:
    plugins: ["GridBased"]
    use_sim_time: True
    GridBased:
      plugin: "nav2_straightline_planner::StraightLine"
      interpolation_resolution: 0.1
In the above snippet, you can observe the mapping of our nav2_straightline_planner::StraightLine planner to its id GridBased. To pass plugin-specific parameters, we have used <plugin_id>.<plugin_specific_parameter>.
4- Run StraightLine plugin
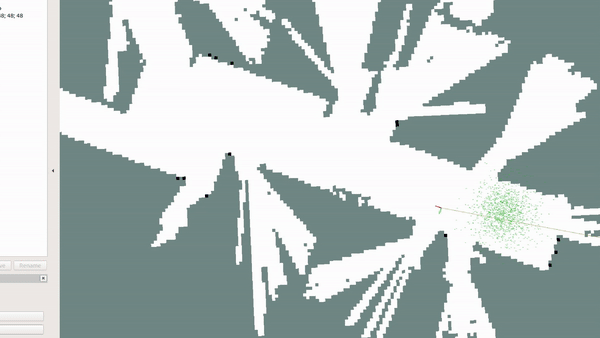
Run Turtlebot3 simulation with enabled navigation2. Detailed instruction how to make it are written at Getting Started. Below is shortcut command for that:
$ ros2 launch nav2_bringup tb3_simulation_launch.py params_file:=/path/to/your_params_file.yaml
Then goto RViz and click on the “2D Pose Estimate” button at the top and point to the location on map as it was described in Getting Started. Robot will localize on the map and then click on “Navigation2 goal” and click on the pose where you want your planner to consider a goal pose. After that planner will plan the path and robot will start moving towards the goal.